
Normans
Noble
Norman Knights: 3 bases
Norman Archers: 2 bases
Anglo Saxons
Noble
Greater Fyrd: 4 bases
Housecarls: 4 bases
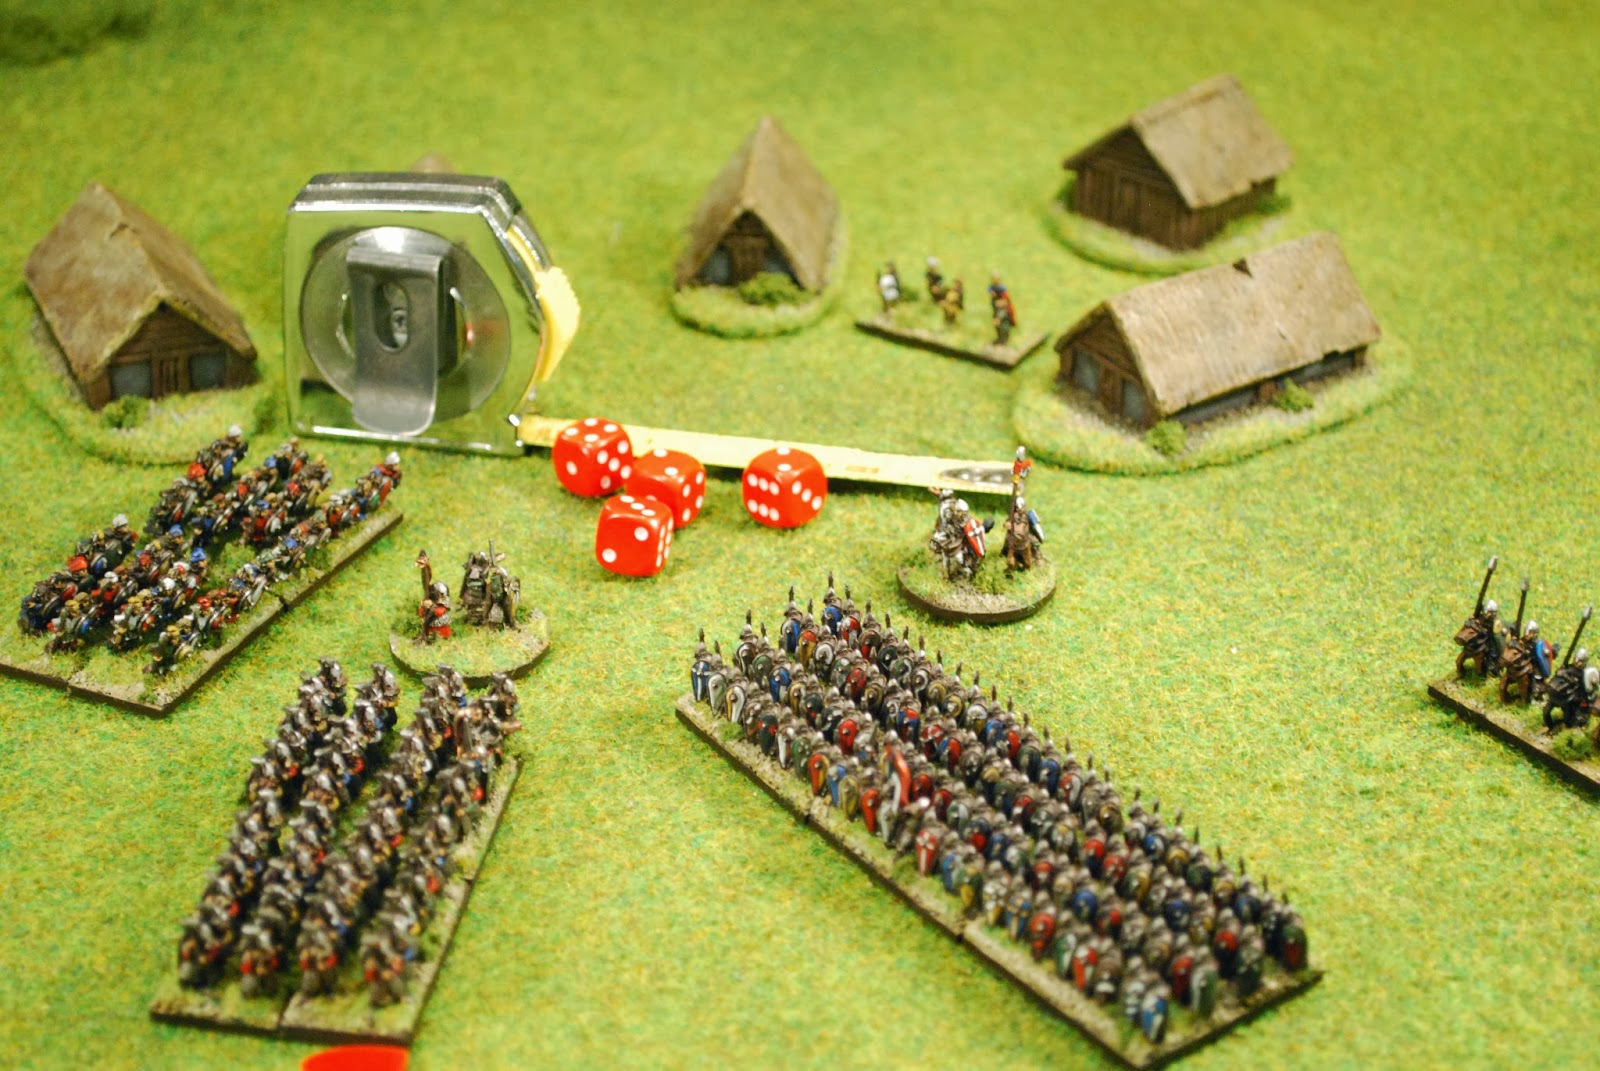
In Seasons of War, players take turns to activate and use all of their units before the turn goes to the other player (in other words: IGOUGO). In this example we will follow a single turn taken by the Norman forces.
Discipline and Action Phase
In the Discipline and Action Phase (D&A), all units in a player's force take part (the only exception to this is if they are engaged in a fight with an enemy unit as described later). When a player wishes to use a unit, a discipline roll is made; this determines how the unit performs in the turn. Even if a player does not want to move or act with a unit in the current turn, they must still take a discipline roll for the unit - there is still a chance the unit could perform a ‘Rash Action’ – which may cause the unit to perform an involuntary action.
The Norman player begins by activating his unit of knights on the left flank. The player rolls a single D10 as Norman Knights have a Discipline Type of D10. The result is compared to the chart below:
1: Rash Action
2-3: Simple Action
4+: Strategic or Simple Action
A 6 is rolled, meaning that the unit can perform either a simple or strategic action. The player chooses to charge the enemies Greater Fryd unit - a simple action.

Making the charge and using other units
The player must then work out if they meet the enemy in combat, or fall short. The charge bonus die (a D4) is rolled - this is added to the units normal move value. The player compares the unit’s total charge value of 10” (base 8" + 2" charge bonus) to the distance to the enemy unit - 9”. The enemy is in range, the knights charge is successful are the models moved into base contact.
Next, the Norman player chooses to activate their unit of Norman Archers. Archers have a discipline of D6, making them more likely to perform rash actions and less likely to be able to perform more complex actions. Fortunately, the player rolls a 3, allowing a single simple action to be performed. A shoot action allows the unit to make a half move and then shoot upon an enemy unit with missile weapons.
Declaring the Anglo Saxon Housecarls as a target, the player measures the range and then rolls 2 attack dice (1D6 for each base as they are armed with bows).
Unlike some other games, there is no target roll to make in order to hit but any 1s are taken away. The player rolls a 3 and a 6. The scores are kept and the enemy now has a chance to negate the rolls by making an armour roll based on the armour dice found on the units profile - in the case of Housecarls, a D6.
In order to stop damage from the arrows, the defending player must attempt to match up the armour dice with the opponents attack dice so that as many as possible equal or beat the attack dice scores.
Rolling the defence dice
The Saxon player rolls his armour dice (one for each successful attack dice) and scores a 4 and a 3. In this case, the defender’s 3 is used to negate the attacking 3 but the 4 loses against the attacker’s 6. For each unbeaten attack dice, a single wound is caused to the defending unit. For every 2 wounds taken, a base is taken away. In the example above, a wound marker is placed with the unit to keep track of the ‘spare’ wound.
Each side is led by leader models depending on the size of the battle. In this instance, only a single Noble is used on each side as it is a relatively small battle, however, larger battles allow several Nobles and even a General model (representing the likes of Duke William or King Harold) to be taken. Leader models may move freely up to 8” in any direction and may join units on their own side to aid them in the fight. Leader models do not need to roll a discipline test to activate. This turn, the player decides to move the leader model up and attach it to the unit of knights. This is done simply by moving the model into base contact with the unit.

The Fight Phase
Once all units in the army have been activated (or rolled for if the player does not wish them to do anything) the fight phase begins. In the fight phase, any units that have charged an enemy or are locked in combat have their chance to attack. Before any dice are rolled, the ‘fight strength’ of both sides is calculated. Fight strength takes into account the size and training of the unit as well as the advantage of charging. After the Fight Strength of each side has been calculated, they are compared. If the Fight Strength of both sides are equal, no side has a clear advantage and the fight continues as normal. If one side has a higher Fight Strength than the other side, they gain re-rolls equal to the difference. In the case of the unit of Norman knights against the Saxon Greater Fyrd, the scores would be calculated as follows:
Norman Knights:
Noble in the unit: +1
Cavalry unit charged: +2
Skilled unit: +2
Total: 5
Greater Fyrd:
Outnumber enemy unit: +1
Poor unit: +0
Total: 1
The Norman side has an advantage of 4 points, allowing the Norman player to allocate 4 rerolls between the attacking and defending phases (this must be decided before any dice are rolled). The Norman player decides to split his dice - putting two re-rolls to the attack phase and 2 re-rolls to the defence phase.
Although the attacks are assumed to be made simultaneously by both sides, it is convenient to work out each side separately. The Norman player rolls their attack dice first (1 for each base in contact and a bonus 1 for the Noble for a total of 4). As Norman Knights are cavalry, they receive a bonus to their dice on a turn they have charged in. This turn their attack type counts as D8 rather than D6. Attacking in the fight phase works in a similar way to when shooting. The scores are as follows: 1, 3, 4, 7. The Norman player decides to re-roll the score of 1 in hopes of getting a better score. Having a higher fight strength pays off and the rerolled die scores a 6.
The Greater Fyrd only have an armour value of d4, meaning that a 4 is the highest possible score. As the attacker has rolled a 6 and a 7 (both higher than 4) these attacks automatically cause damage and cannot be negated by rolling. Two D4s are rolled for the remaining attacks that can be defended against - netting a roll of a 1 and a 4.
Just as in a shooting action, the armour dice are matched up to the attack dice. The 4 equals the attacking 4 but the 1 cannot negate any hits. In total 3 wounds have been caused meaning a single base and a single ‘spare’ wound have been caused. Before these are implemented however the Greater Fyrd have their chance to attack.
Attacking back and resolving combat
The Greater Fyrd have a total of 4 attack dice which are rolled using the unit’s attack type of D4. A 1, 3, 4 and 4 are rolled, just as in shooting any 1s are taken away leaving a 3, 4, 4. In response, the Norman Knights roll: 2, 5, and 8 on their D8 armour dice. The Norman player decides to re-roll the 2 and scores a 3.The Knights are able to match up all of the armour dice to negate all damage to the unit.
After all damage has been worked out, and all units have had a chance to attack, a Morale test is rolled by any unit on the losing side (the side that has taken the most damage). In the event of a draw no roll is made. The Saxon player rolls a die matching the morale type of the unit, in this case a D4, and subtracts the number that the unit lost by (3). Rolling a 3, the resulting score comes out as a 0 (3-3=0). This causes the unit to break and flee.
The unit immediately moves a distance of 4" + D4” directly away from the enemy. A retreat token is also put next to the fleeing unit. The Norman player may next choose to give chase or attempt to give chase. In this case, the player wants to hold the unit back in order to face down the Housecarls in the following turns and successfully passes a discipline roll for restraint.
After the fight phase, the turn is over. The Saxon player may now act with their units. They will need to decide how to react with their Housecarls and Noble and attempt to rally the fleeing Greater Fyrd in the face of the mighty Normans.
No comments:
Post a Comment